 Miguel Escobar Published April 9, 2018
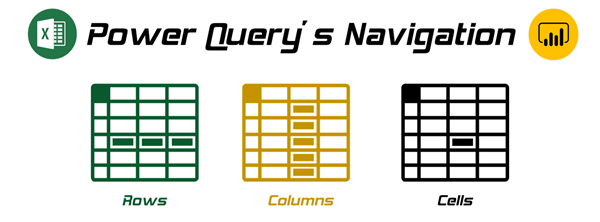
What is a “Navigation” step in Power Query?

When using Power Query, you might’ve come across a step that reads “Navigation” and is usually automatically created for you by Power Query, but…what does it do?
Well, if we look at the code that it was created for the Navigation step, it reads:
= Source{[Item=”SalesTable”,Kind=”Table”]}[Data]
It has some curly brackets mixed with some square brackets and some nomenclature that seems pretty strange at first. This is one of the ways that Power Query automatically creates a navigation step, but there are other ways to achieve the same result and depending on the situation Power Query might create a different code.
This is the main reason why I’m writing this post. To document what are the ways that Power Query has in order to Navigate to a specific Column, Row or even a specific Cell.
Some resources that might help you understand more about Power Query’s formula language AKA M Language:
Types of Navigations inside of Power Query

There are 3 types of navigations inside of Power Query, but for each type there are different methods that you can use. In this blog post we’ll stick to the basics so you can have a better understanding of the whole navigation concept.
Before we move forward, I’d highly recommend that you download the sample files so you can follow along. Click in the button below so you can download the samples used in this article:
Once you download the files. Open a new workbook in Excel or a blank report inside of Power BI Desktop and connect to the ‘Source Data.xlsx’ file. Then connect specifically to the ‘SalesTable’ table. The result of that operation will yield the following result:

Column Navigation
Based on the result shown in the previous image, which is a table, if we wanted to navigate to a specific column, all we would need to do is simply right click on one of the columns and select the option to “Drill Down”

when you click on that button, a new step will be created and will give you a List.

When you extract a column out of a table its transformed into a List.
Notice the code that was created for us. The format is #”Name of Previous Step”[NameOfColumn] and this works in this case because is being used against a table, so #”Name of Previous Step” is a table.
Power Query also has a function for this which is called Table.Column and you can learn more about that function here, but it’s way easier to do this through the UI and with just a few clicks.
Since the data is now in a list, we can use List functions against it, but that’s something that we would see in a different blog post.
Cell Navigation
What if you want to navigate to a specific cell? Using the result from the previous image where we had a list. I can also right click on any cell and I’d get the “Drill Down” option as well. That is AMAZING!

Once we click on it, Power Query will drill down or navigate to that specific cell and the result looks like the following:

in our case, this cell value is a Text value so that’s why we get the Text Tools contextual menu in our ribbon, but pay close attention to the formula bar and the code that Power Query automatically created for us.
This specific code has the format of StepName{RowIndexNumber} and this specific RowIndexNumber is one that is automatically generated by Power Query. Power Query has its own index and it starts from 0, so if you’re trying to get the first row of a list or a table, you’d use {0}.
The good thing is that you don’t necessarily need to be in a list in order to have the Cell Drill down or Navigation option. You can do it in a table or even in a record and you’ll get the Drill Down option as shown below

Note: Again, this is just one of the methods available for you to achieve a cell level navigation
Row Navigation
What happens if we want to get a whole row from a table? There are multiple methods to achieve this, but let’s use the one that we learned from the CELL navigation.
When you click on a row, you’ll notice that the preview pane underneath shows you what appears to be a record, and that is because a row from a table is essentially a record.

The only inconvenient here is that you can’t right click on a row, so we are going to use custom M code in order to navigate to the first row of this table. For that, click on the fx icon in the formula bar which will create a new Custom Step which should be called “Custom1” which simply references the previous step. Then we’ll simply modify the formula inside that step to be
= #”Changed Type”{0}

notice that the important part here is the curly brackets and the number inside those curly brackets which is 0 (because we want the first row).
Conclusion
Special thanks to the user “Thunderlight” how brought this question to my attention on the official Microsoft Power Query forum here.
Again, there are other methods for most of the navigations showcased here and I hope that this blog post serves as a good start for your journey in how Navigation works inside of Power Query. If you wish to learn ALL about Power Query, its M code and even all of the methods that you have to do navigations in Power Query then I invite you to join our Power Query Academy where we have a full section dedicated to this with even more awesome and practical examples.
To learn more cool techniques and more advanced scenarios with the M language, go ahead and enroll to the FREE trial of the Power Query Academy where I talk more in detail about these type of techniques.


This is helpful! Thanks for sharing!
ACTUALLY I’VE WORKED THIS OUT….MY ERROR….SO NO NEED TO APPROVE THE POST…THANKS.
Hola Miguel, In the line = #”Changed Type”{0}, you take the first row of the Changed Type recordset. I would like to replace the 0 with a value calculated in a previous step of my query. I’m trying to do this by literally substituting my stepname for the 0. e.g. =#”Changed Type”{MyValue}
If I’m here, it’s because this is not working. I get the error message “There weren’t enough elements in the enumeration of complete the operation.”
Any chance of showing me how to achieve this?