 Miguel Escobar Published February 26, 2019
I highly recommend that you read the first and second part in this series prior to reading this one, but you can jump right in if you understand the main concepts of parameters, arguments and functions in the M language.
Understanding the Combine Files Experience: Practical Example

The scenario that we’re going to tackle is going to be THE most common way that people use Functions without even knowing what is going on.
We’ll go over the new Combine Files experience that was introduced in Power BI Desktop at the start of 2017 and how everything changed from there.
We’ll try to combine 3 files that we have inside of a folder. Each file is a simple csv with monthly data and we’re trying to append or consolidate everything into one big tall table.

You can follow along by downloading the sample files used from the button below:
Let’s jump right into it!
Connect to the Folder
Make sure that you unzip the downloaded file before continuing and that you remember where you saved that folder / files.
The first step is to go ahead and connect to that folder that we just unzipped.
So go ahead and select the “From Folder” option from Power BI Desktop or Power Query inside of Excel:

this will prompt a new window where you’ll need to input the folder path:

After hitting OK, a new window will appear that shall give you a preview of the files inside of that folder. Instead of clicking on Combine, click on Edit or Transform if you’re inside of Power BI Desktop:

This will then take us to the Power Query Editor where we’ll actually start doing the magic:

This is usually the time when people click on the Combine Files button, but in this case we’ll be doing it completely manual so you can have a full understanding of what actually happens behind the scenes when you click that button and how everything is accomplished using nothing but functions and Parameters.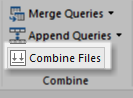
(don’t click that button! keep reading the post!)
Grab a Sample File
The data inside each of our files looks like this:

it does require a set of transformations, but instead of defining the transformations on a per file basis, we can create what it’s called a Sample File and then create a function from that Sample file which can later be invoked against each of the files inside of our Folder.
It might sound like a complicated task, but it’s actually quite easy.
What we’ll end up doing is following one of the Navigation techniques that I explained in this post.
All we need to do right now is simply right click on one of the files (The text that reads binary in green or yellow) that we have in our folder and use that as our Sample File.

Don’t forget to select the option that reads ‘Add as New Query’. The result of that operation will be a new query with just a Binary:

I highly recommend that you rename that query to Sample File Binary.
Create the Parameter

So far we have 2 queries. One is a table of the files inside of our folder and the other one is just a binary from one of the files in the folder.
The next step is to create a Parameter. We’ll do that by going to the Home Tab, clicking on Manage Parameters and adding a new Parameter as shown below:

Create a Function
With the parameter in place, the next step is to create the Custom or User Defined function.
We’ll start by simply creating a reference over the Sample File Binary:

and on the newly created query, replace the formula in the formula bar from = #”Sample File Binary” to be =#”Sample File Parameter”
Once you hit enter, then Power Query will try to act automatically and the result will look like this:

I’m going to rename this query from Sample File Binary (2) to Transform Sample File.
Now all we need to do is right click on our query and select the option that reads Create Function…:

this will display another window where you can define what your new function should be named:

I chose to go with Transform File Function and once you hit OK you’ll get the following:

We’re not done yet. Now we need to create our function, but we don’t have to write a single line of code for it.
You can go back to the Transform Sample File query and start doing the transformations in there.
We need to do only 3 Transformations, but before do any of them, I highly encourage you to delete the Changed Type step. Hardcoding the name of the columns might create some errors in the future and that’s the main reason why we get rid of any Changed Type steps at this stage.
Replacing Values
Notice how in the first column, named Month, we have a bunch of blank values.
In order to replace those with the current name of the month, we need to replace the null values with blank by right clicking on the column and selecting the option to Replace Values and the entering the arguments as shown below:

and then you can go ahead and do a Fill Down on that column:

Unpivot
We see that the markets are across the columns, but we need them all to be inside a single “Market” or “Region” column, so we need to unpivot those columns. To do that, we simply select the 2 columns that we don’t want to unpivot (Month and Product Name), right click on them and do the Unpivot Other Columns Operation:

Rename Columns
After doing all of the previous steps, we end up with a table with 4 columns, but we need to rename the column Attribute to Region and the Values to Amount:

You might not see it, but everything that you just did has been translated into a piece of M code and canned into our Transform File Function.
Organize everything in Folders / Groups
Before we move forward, I just want to tidy things up, so I’m gonna go ahead and place everything within Folders / Groups:

This is a completely optional step, but it adds a lot of value when you want to go back to your query and see how everything ties together. Creating a group is as simple as simple right clicking on the Queries pane and select the option to create a Group or move a query from one group to the other.
Apply the function to the rest of the files
OK! Everything is good to go. All we need to do now is simply apply that function to all of the files inside our Monthly Sales Data query, how do we do that?
Simply go to that query, click on the Add Column menu and select the option that reads Invoke Custom Function:

This will create a new column and I really just want to keep that new column and the name of the file, so I’ll delete the rest of the columns from my query and then I’ll go ahead and click on the Expand button for the newly created column and expand all of the columns inside that table column:

and, after setting the data types for each column, I was able to test and make sure that all of the data was indeed in this table:

Now you have a better understanding of what happens when you click the Combine Files button and how powerful Functions are.
Extensibility
The good thing about this approach is that it is quite user friendly. You can add new parameters to your function and the code will adjust accordingly.
You can add new steps, remove the previous ones or change them from the Transform Sample File query and the function will adjust automatically without you ever needing to write a single line of code.
For example, I could potentially add a new Parameter called TopRows:

Go to my Transform Sample File query and add a new step to Keep Top Rows (using that newly created Parameter as the argument):

and then when I go back to my Monthly Sales Data query it’ll have an error because the Function requires 2 parameters and we only passed 1.
This means that the Dialog will show us 2 parameters instead of one and here’s what I did with that:

which means that I’ll only get 1 row (the top row of the table) from each file.
Here’s what that looks like:

Why this and not the manual approach?
If you’re an advanced M user, then you could probably make this happen by writing the M code yourself, but the debugging experience for any other approach other than the one described in this post is simply not effective as it consumes 80% of your time going back and forth from seeing the code and running the actual code.
With the approach described in this post you can have the code in one query and a preview of how it works in another, which is, from my own experience, invaluable when you’re trying to understand a code that you didn’t create.
That’s why I recommend this approach even to the most seasoned M professionals out there. This is a FAR better experience when you’re trying to debug and understand ANY code from ANYONE.


this was a lifesaver!!! I kept getting OLE DB errors because my files in the folder I’m querying have varying columns. all fixed by removing the change type in the transform! thanks 🙂
Dear Miguel,
I have been applying the above to try and solve an issue I am currently encountering in Power BI.
I get a list of documents from a SharePoint location, filter for the correct folder, sort for Last Modified and keep only the top row (last modified file) to perform the rest of the queries on.
However, I run into an issue when it retrieves a different, newer file. Because it cannot identify the previous file names anymore. How can I make this robust? Many thanks for your help!
Hi Miguel,
thank you so much for this post. You explained everything so well and it is now working like a dream. Power Query is amazing!
Hi Miguel,
This looks like a great post! Trying to get to end of it.
What if I am using .xlsx files instead of .csv? Under “Create a Function” section, my outcome looks very different after I replace the formula in the formula bar from = #”Sample File Binary” to be =#”Sample File Parameter” and hit enter.
I’m quite a beginner I should also say. Appreciate your help! Thanks.
This other article might be able to give you more info for excel workbooks: https://www.thepoweruser.com/2019/04/23/combine-or-append-data-combining-excel-files/
Really amazing content
Superb content!
This is the ONLY explanation I’ve been able to find on the internet of the what/how/why for each of the steps done by “combine” files. Thank you so much. Now I really understand what and why each piece is required to combine files, and I can customize what’s being combined.
What happens if the sample file is deleted from the folder? Will the query break down? How can we avoid this and future proof the query?
The “Transform sample file” query will fail, but the function shouldn’t break as it’s just code. If you use the code against the files in your folder then no issues should arise.
If you wish to never have to deal with the “Transform sample file” query to fail, then select the option that reads “Select first from list” when building your sample transform query.
Hi Miguel,
Great content, thank you very much, it is just what I needed!
I’ve created my sample and applied this to the rest of my files however I am getting the following errors:
– On row 39, each column states ‘Error’ and no further rows are showing after. I have 143 excel files the sample is being applied to but this stops when there is an error.
– When I close and load the data into excel, I get an error saying ‘Column 61’ of the table wasn’t found. This then stops further files being updated and only 8 files are pulling through to the new excel file.
Are you able to help with the above at all?
thanks
Hey!
Absolutely – we offer remote consultancy services so we can help you optimize your queries. Please reach out with your inquiry to my email address: miguel@poweredsolutions.co
It might be something simple, but it’s impossible to say without better understanding your data and your query.
Best!