 Miguel Escobar Published April 23, 2019
In the previous post we saw how we were able to combine multiple files from a Folder.
In that post we were using flat files but, how would that process be for Excel files?
This is the post where we’re going to see the difference between simple flat files and more complex files (like an Excel workbook) when it comes to using the Combine Files experience inside of Power BI / Power Query.
What’s different between combining flat files vs something like Excel files?
That’s a great question! the first thing that we need to understand is that a flat file has a very basic structure, whilst something like an Excel file is not as simple and you need to define what exact object you want to connect to.
With Power BI / Power Query, you have the option to connect to 3 types of objects from an Excel workbook:
- Sheets
- Tables
- Named Ranges
In contrast, when you want to connect to a flat file you go straight into the data because the file structure is pretty simple.
How does this difference between flat files and Excel files impact the Combine Files experience?
Another great question! and the answer is simple: you need to take in consideration this file structure in order to create a “recipe” (function) that will work with all the files that you want to combine.
Usually the issue that most folks have when using an Excel Workbook as their source for Combine Files from a folder is that they define their recipe to be too specific in the sense that it’ll work for some files but not for all.
For example, some people specify that they want to get the data from a Table named “Table1” from their “Sample Transform File”, but that table only exists in a their Sample File and not in the rest of the files.
Let’s do an example on combining multiple Excel Workbooks from a folder
Step 1: Connect to the Files
This time the situation is going to be a bit easier in terms of how many files we’re going to be dealing with.
We only have 2 files in our folder, but within each file we have 12 sheets (1 for each month of data) and within those sheets with a table which is where the actual monthly data is being stored.

Our goal is to connect to the files, grab all of the Tables that have the data that we want and then combine / consolidate / append everything into just one big table.
If you wish to follow along, you can download the files from the button below:
Similar to what we did before, we’re going to be using the From Folder experience:
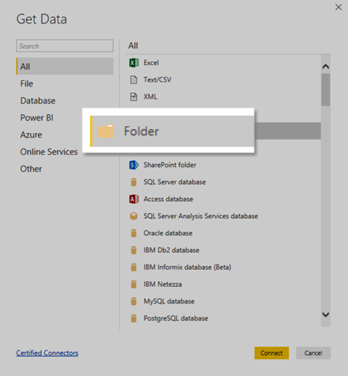
and once you select the folder where your files are, you might end up with something like this:

Remember, we only have 2 files in that folder, but in the preview we get 3 – why are we getting 3?
If you take a closer look, you’ll notice that one of those files listed has a prefix of ~ which is a way to tell if the file is a temporary file or not. This means that the 2017.xlsx file is in use, so let’s go ahead and click on the Edit button so we can filter out any temporary files.
This is quite easy, just do a Does Not Begin with filter on the Name column like this:

and you’ll end up with just 2 files which are exactly the 2 files that we need:

Step 2: Using the Combine Files Experience
Let’s go ahead and click the Combine Files button (in the Content Column) and see where it leads us:

As you can probably tell, there’s a lot of data in that file and you can also make some distinctions between the objects found in that file by just looking at the icons. The one with a blue bar on top are tables and the rest, in our care, are just sheets.
Here’s the culprit of the most frequent problem users are usually having: they select just 1 table or don’t know how to select multiple tables.
Instead of trying to select multiple tables, I want you to click on the “Sample File Parameter” on top which has a little folder icon to the left of it. Select it and then hit OK
Head over to the query on the left that starts with Transform Sample File From and take a look at it:

In there, what we see is a table with ALL of the objects that we can access from our Sample File.
In our specific case, we want to only access the files that have the Kind equals to Table, so let’s do that filter:

I’ve highlighted some rows that we don’t want as they don’t contain the data that we need. The tables that we want start their names with a prefix of Sales_, so let’s go ahead and do another filter on the Item column so we only get the rows that start with Sales_:

We’re finally done with the Filter process and all that we need to do now is simply go to the Data column and click on the icon right next to it which will trigger the Table.ExpandTableColumn operation:

and the result of that operation will look like this:

I highly encourage you to get rid of the columns that you don’t want. In my case, I just ended up with the columns that I wanted from the actual tables:

and with that we’ve finalized what the recipe for transforming every single file in that folder should be.
Step 3: Validating the Results
If you go back to your original query (mine was Sales in Excel Files), you’ll notice that you have an error. You can read this blog post to learn more about the types of errors in Power BI / Power Query but, in short, this is a step level error that is referencing a Column that no longer exists:

What I usually recommend is that you simply delete that last “Changed Type” step, because the one previous to that works just fine.
When you try validating if all of your data is in there, you shouldn’t be surprised that truly all of it is in there:

The last step is to define the data types of each of your columns and, if you want, you can rename the columns as you please and this is what my query looks like after I finish renaming the columns and adding the correct data types:

Last but not least, here’s a snapshot of how all of the queries work together:

as you can probably tell, it has the same look as the one that we saw in the previous post for the flat files. The reality is that the process is exactly the same regardless of the files that you want to combine. The only thing that changes is the code / steps that happen inside of your Transform Sample File.
Final Words
While it is not so easy to distinguish that the Folder icon when connecting to an Excel file is a valid option, it is recommended that you use it if the files that you’re trying to combine do not have exactly the same names when it comes to either the name of the sheets, tables or the named ranges that you want to combine.
By default, when you get that “Combine Files” window where you can select the objects within the Excel Workbook, you’re only allowed to select one option, so you can’t select multiple tables, sheets or named ranges from there. If you wanted to do that, you’ll have to go through the process described in this post.
Have you ever had a bad experience or an issue when using the Combine Files experience against Excel Files? share your experience with me in the comments section below.