 Miguel Escobar Published September 29, 2019
For quite a few years, I’ve been receiving one question that I haven’t fully delved into. It goes something like this:
I manually add new columns to the output of my query (created with Power Query in Excel), and when I hit the refresh button, I lose everything. Why does this happen? How can I preserve the data from my manually created table column?
This question comes from way back in the day when Power Query initially launched.
Imagine this scenario:
- You create a nice query
- You load you query to a table inside of an Excel Workbook
- You add new columns adding your own comments or notes manually to the cells of those new columns
- You refresh your query and you noticed that you lose ALL of the data from the cells in those columns that you manually created
Here’s a before and after pictures of how that would look like:
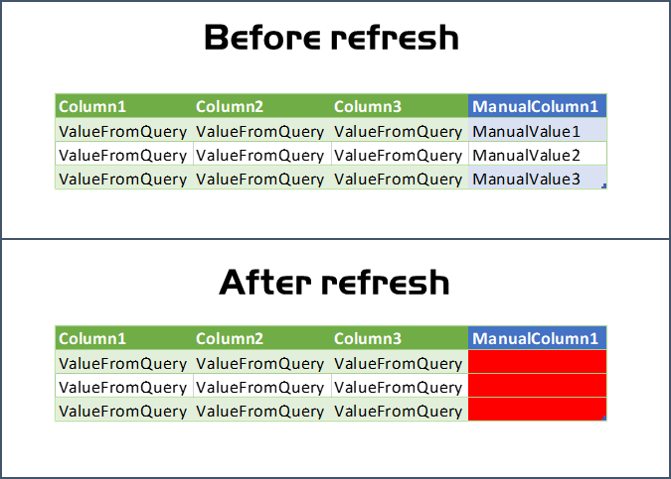
Why does this happen? How can we preserve the data that we entered?
A timeline for fixes and workarounds
-
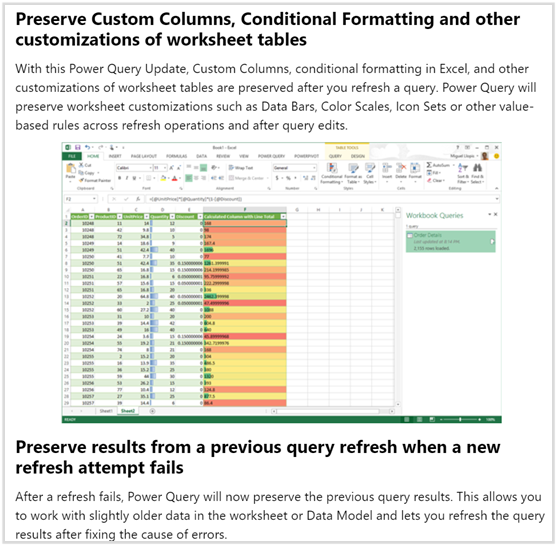
6-May-2014: It was first addressed by the Power Query for Excel team here (url). It initially completely got rid of your manually created columns, but then this new version of Power Query implemented a way to preserve new table columns if they meet certain criteria. It wasn’t perfect, but it was a good first step.
- 8-May-2014: the initial fix that Power Query implemented didn’t fully addressed people’s needs, so some creative workarounds started emerging. One of them was even suggested by one of the developers behind Power Query here (url)

- 2015: more and more workarounds (MacGyver ways as I like to call them) emerged during those times, but both Ken and I were too busy writing our ‘M is for Data Monkey’ book and we had a different way to handle these scenarios. I personally suggested people to create a data repository

- 9-Feb-2016: A blog post written by Imke hit the internet by storm where she talked about the concept of self-referencing queries or self-sourcing queries. Read the blog post here (url)
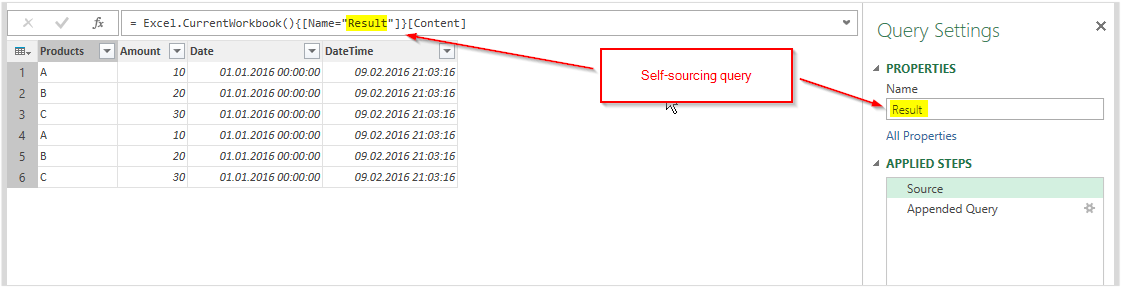
- 21-Jun-2016: The blog post written by Imke sparked the creativity from Matt Allington who wrote a blog post on self-referencing queries inside of Power Query for Excel which, to this day, still solves the main situation that most people face. Read the blog post here (url).

And ever since that blog post came out, it has been the go-to reference for people wanting to do a self-reference query in Power Query for Excel.
Why Power Query and Excel couldn’t fully solve the problem

A piece was missing!
The reality is that this is more of a storage or database issue, rather than one related to Power Query or Excel.
Power Query is a Data Preparation tool that is designed to Extract, Transform and Load the data. It operates with its own engine called the MashUp engine to perform that set of transformations that you define in the Power Query window.
The way that it does that is that it connects to a data source of your choice, applies the transformations that you’ve defined and then loads the output of those transformations to a table, in this case inside of an Excel Workbook.
What this means is that Power Query doesn’t store any data and that’s why when you do a refresh it recalculates the whole table. It also means that Power Query is not aware of any new columns or changes that could’ve been made to the output table in Excel, since it does not store and is not aware of that data.
Power Query is only aware of:
- the data source definition (aka Data Source)
- the set of steps of the transformation (aka Query or Query definition)
- where it should load the data (aka Load destination)
In this case what we are trying to accomplish would imply a dedicated solution to store the data before you hit the refresh. This is something that we would love to be handled directly by Excel and Power Query but, unfortunately, unless it’s a table formula there’s no guarantee that the value / formulas will stay in place after the refresh.
A new and optimal approach to preserve data in new columns
It’s been 3 years since Matt wrote that blog post and it wasn’t until a few weeks ago that a new and quite simple approach came up. The functionality is in Public Preview but will hit GA during the month of October 2019.
Note: Matt’s approach is still valid and will serve you if you’re looking for a quick and easy fix for a short term, non-critical solution.
We now know the components that we want as an end-user. We need:
- Excel
- The Power Query Experience
- A way for us to add new columns and preserve those new values/columns
How do we do it? Dataflows for PowerApps to the rescue!

Using Dataflows for PowerApps and the PowerApps add-in for Excel
Before we begin, this setup does require that you have a PowerApps account and an environment with the correct access so you can create your own dataflows and have full control of your entity.
If you do not have PowerApps, then you can still use Matt’s approach, but I highly recommend that you give Powerapps and the whole PowerPlatform a chance as they do have a pretty convincing and cohesive integration/story and you don’t have to worry about things like:
- Author dependency: you’re the only one that knows how to troubleshoot the solution that you’ve created depending on how you’ve done the merges and how they work
- Multiple users: no more issues with credentials, permissions or asking other folks to please refresh and stop using the file so you can work on it.
- Row limit & Performance: depending on your query, refreshing the query could be a taxing operation to your computer, not to mention that if you’re dealing with vast amounts of data then things might go pretty slowly afterwards in Excel
There are other benefits such as the centralized storage (the Common Data Model), but those are specific benefits that come with the usage of PowerApps as not only your application but also as your storage (with CDM).
Let’s go step by step on how to come up with the solution.
Step 1: Defining your data source
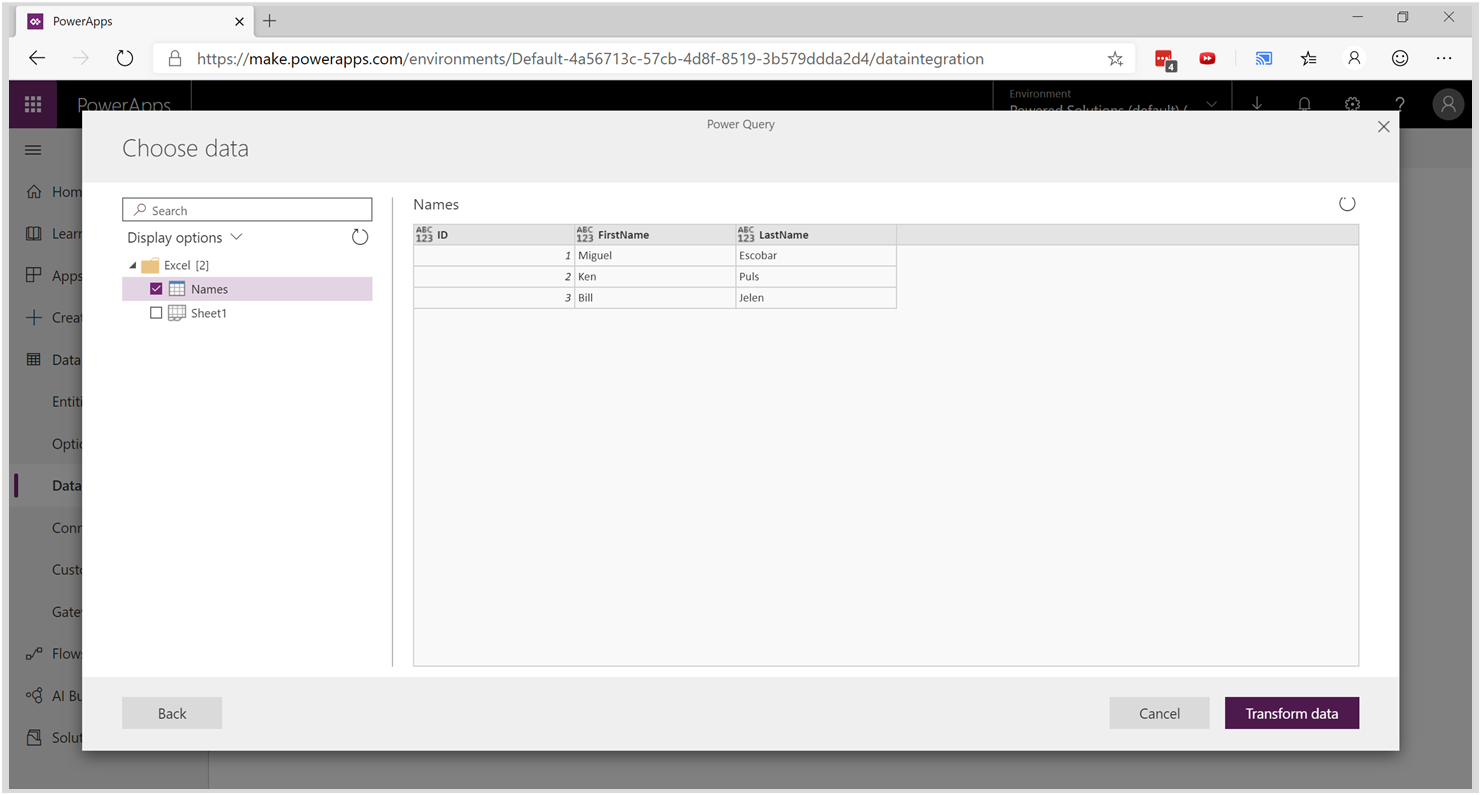
In my case I’ll be using a simple Excel workbook with 3 fields:

- ID – this is the unique identifier of every record in my data source
- FirstName – the first name of the contact
- LastName – the last name of the contact
In essence, this is a table of contacts. My idea is to later add new columns to this table like “Country of Origin” and other like “Follow Up Date”
Step 2: Creating the Dataflow and New Entity in PowerApps
You can go to powerapps.microsoft.com and sign in. Once signed in and in Powerapps, head over to:
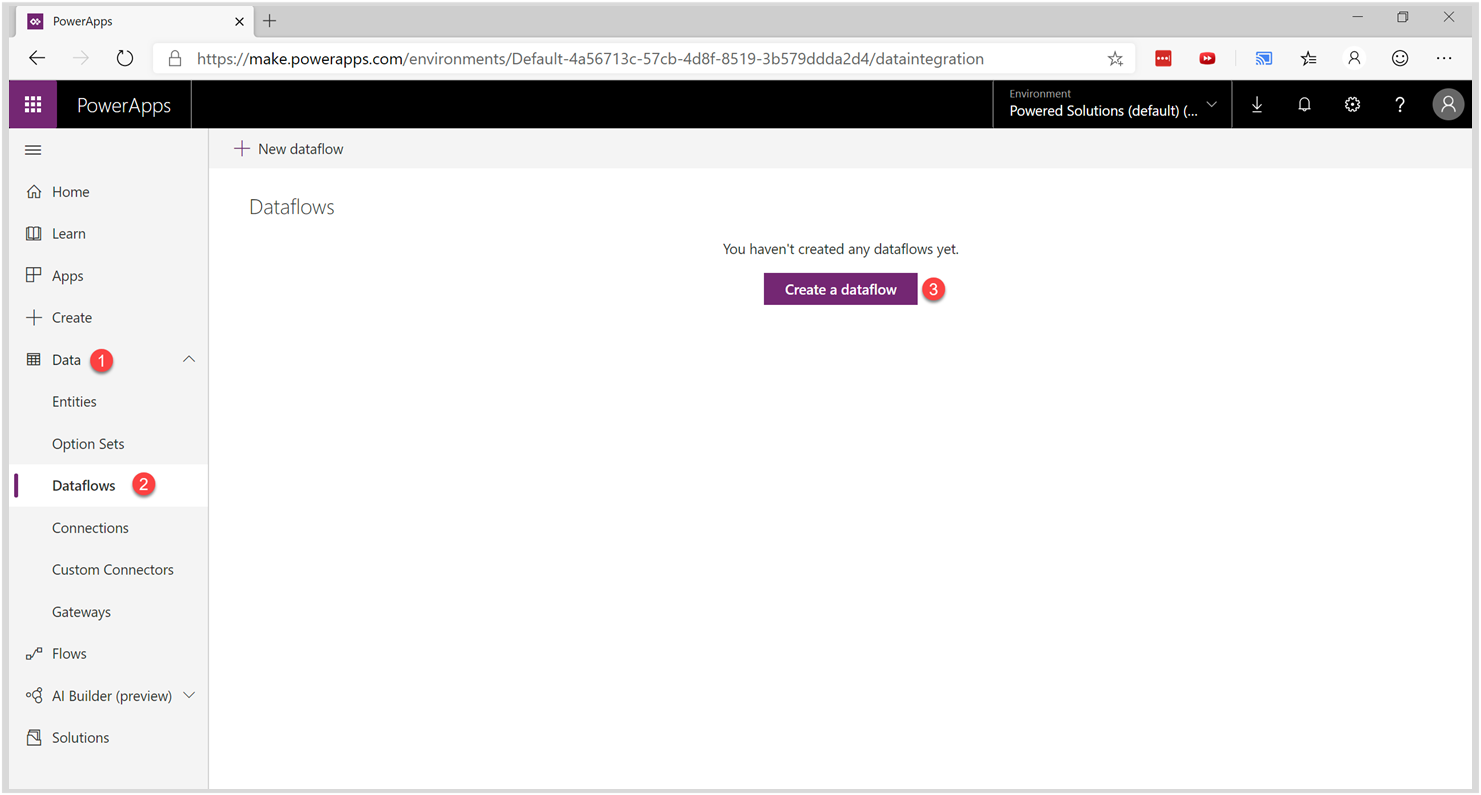
- Data tab
- Dataflows
- Create a dataflow
Give your dataflow a name:

You’ll then be greeted by the Power Query online experience which looks like this:
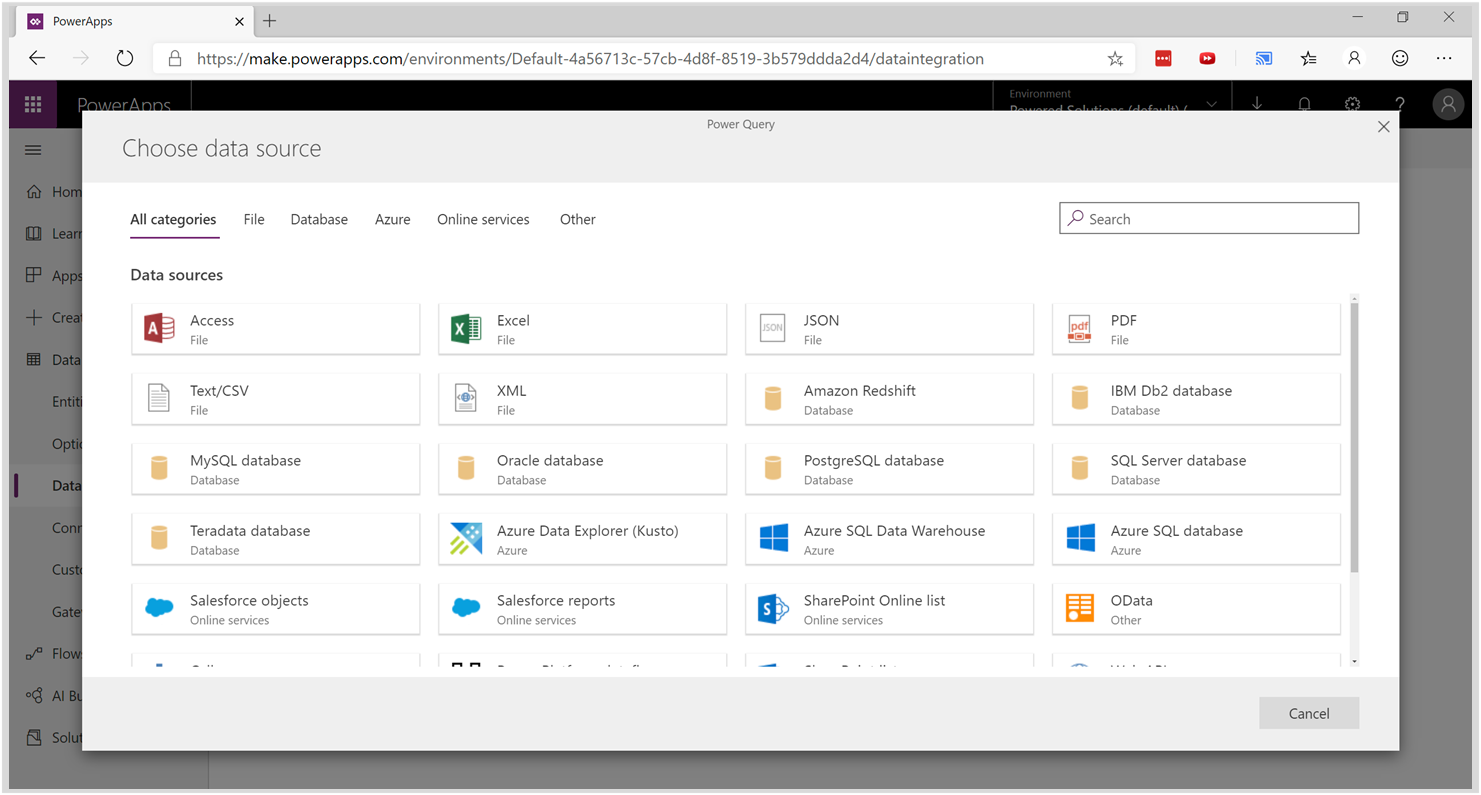
I’ll be connecting to the Excel file using a gateway, but the idea is that you can connect to any data source of your choice. This works for any data source and to a certain degree you could even use the same query that you already created and imported here as a new dataflow.
Again, in my case I’ll be using the Excel connector with a gateway (you may or may not need a gateway, read here for more info on that), but when I had to enter my data source it looked like this:
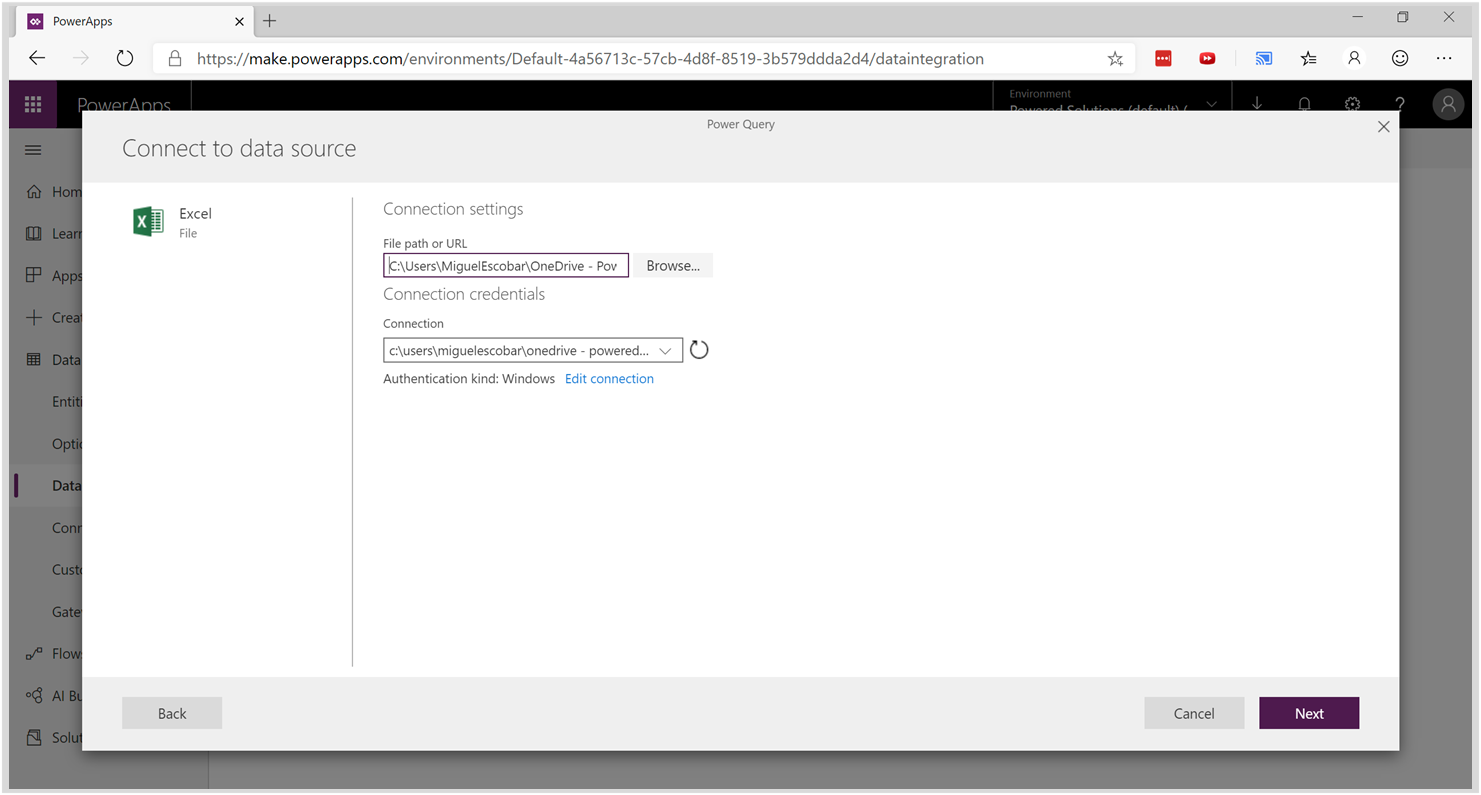
And then I was able to see my workbook and the table that I needed:
Again, everything looks quite similar to the experience that I’m used to with Power Query. It’s just that it’s the online experience.
In my case I didn’t have to do that many transformations. All I wanted to do was to merge the First and Last Name into a single “Full Name” field and then keep the ID column as the unique identifier of my records and then finished by setting up the data types.

Now comes the part that is different to the Power Query for Excel experience.
In Power Query for Excel we are only able to load the data to either a table in the workbook or to the data model. In PowerApps we’re able to load the data to a new entity – which is a specific type of object for the Common Data Model, but to simplify everything, it’s basically a table that lives in the cloud through the CDM.
Here I set up my dataflow to load the query to a new entity, name the new entity and set up the key field of that new entity:

Notice that I also checked the option to “Delete rows that no longer exist in the query output” which will come in handy for me later.
After hitting Next, I can set up how to refresh my dataflow. By default, it’s set up to “Refresh manually”, but you can change that to be on a schedule of your choice as shown below:

For my demonstration, I’ll just use the manual approach and hit “Create” so we can create that new entity, but you can see the potential of just having that automatically refresh the query whenever you need it to be refreshed.
In the end, it gave me this result:

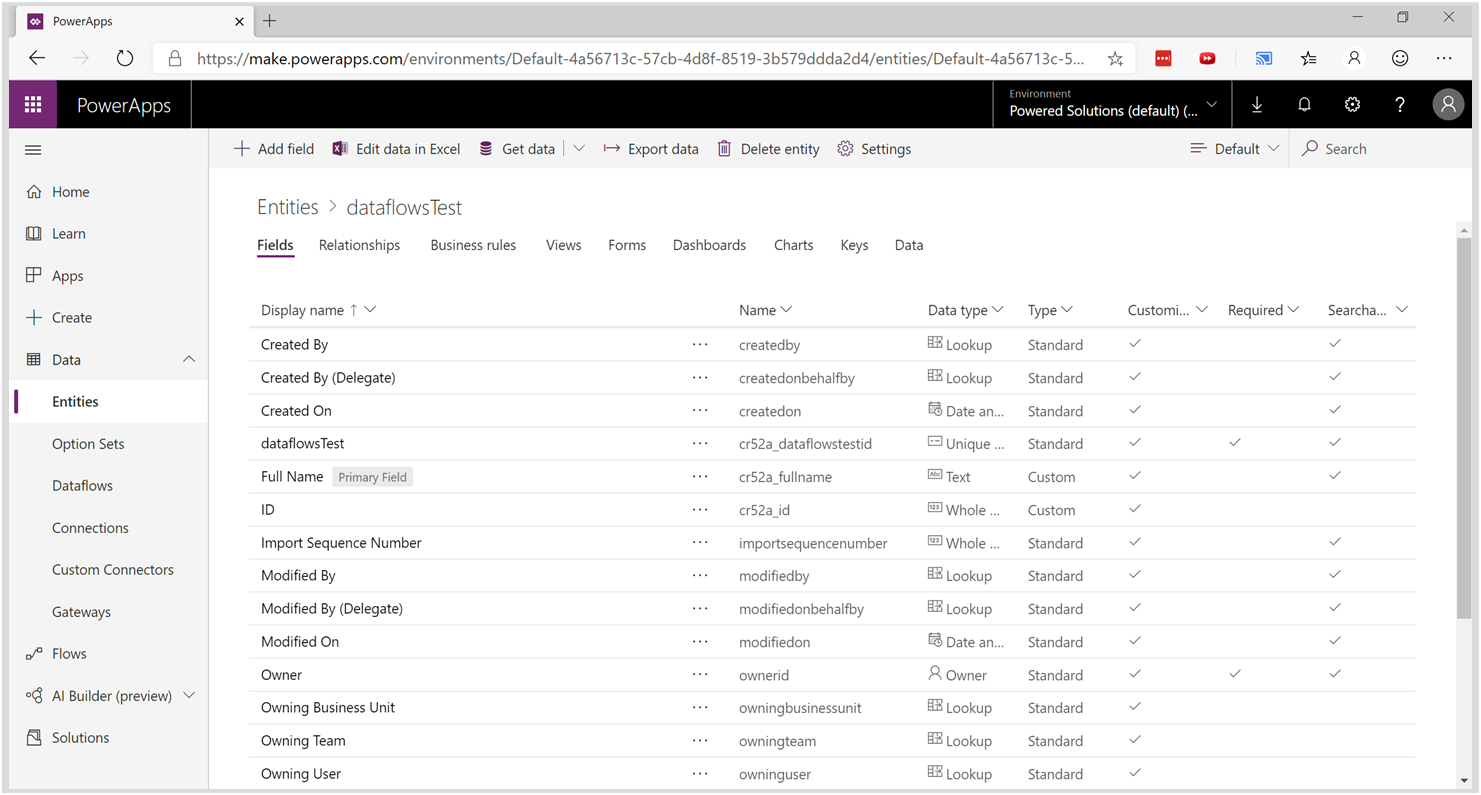
Step 3: Adding new Columns to our Entity
Now that the new entity has been created, go inside the Data tab to the “Entities” option and find your new entity. In my case, my entity is called “dataflowTest” and it looks like this:
In here, click the ‘Add field’ button and you’ll be able to create a new column or field. In my case, I’ll be adding a new column by the name of “Country”:
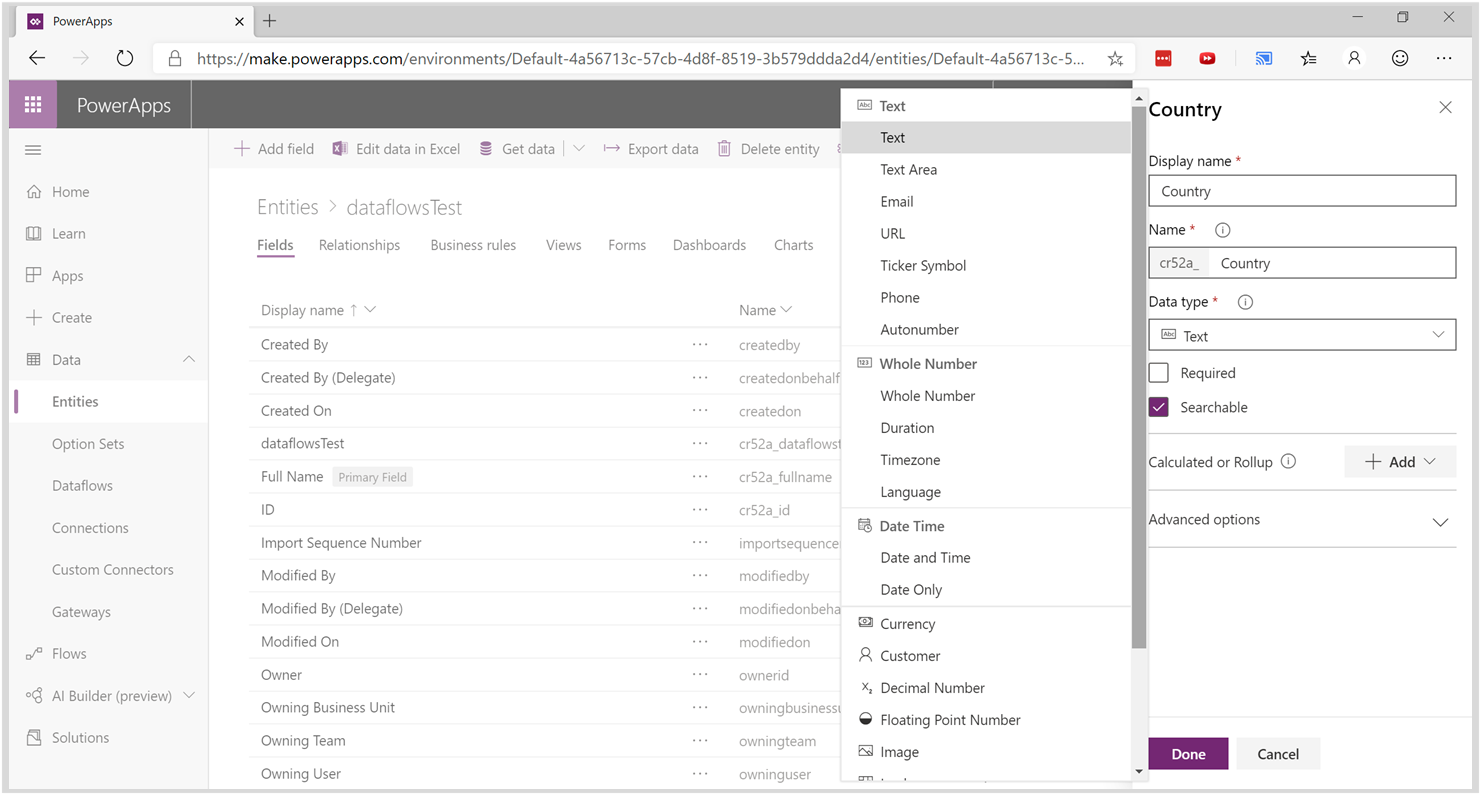
After hitting the done button, you need to save your entity.
Step 4: Adding data to your newly created column
See that button on top that says, “Edit data in Excel”? click on it. It’ll download a file that will open in Excel.
Your Excel will look like this:
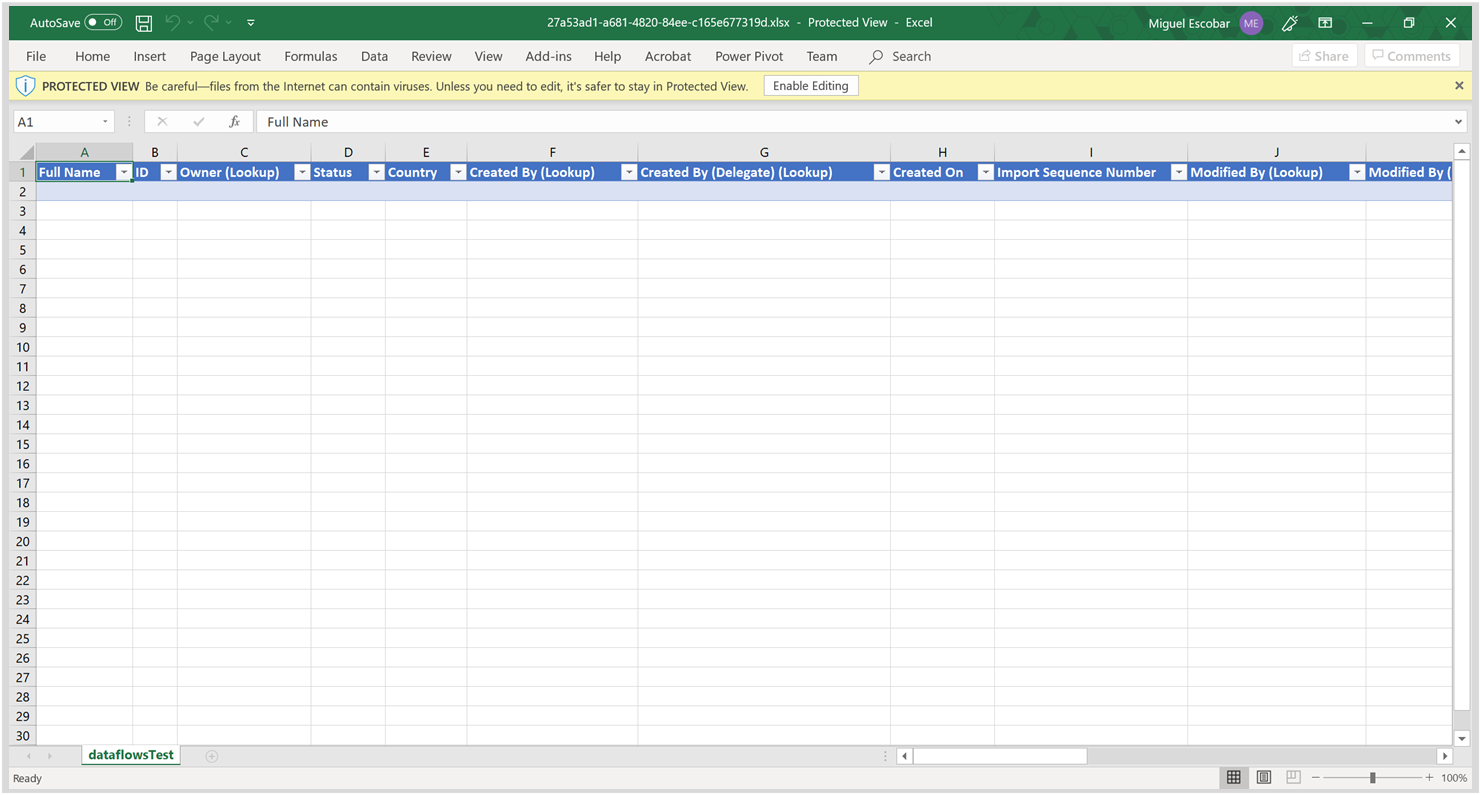
Click on Enable Editing and, if you don’t have the PowerApps Office Store add-in, it’ll ask you for permissions to install the PowerApps add-in.
After installing that add-in it’ll ask you to sign-in. You might also hit an error about credentials, just make sure that you’re signed in and everything should load correctly as shown below:

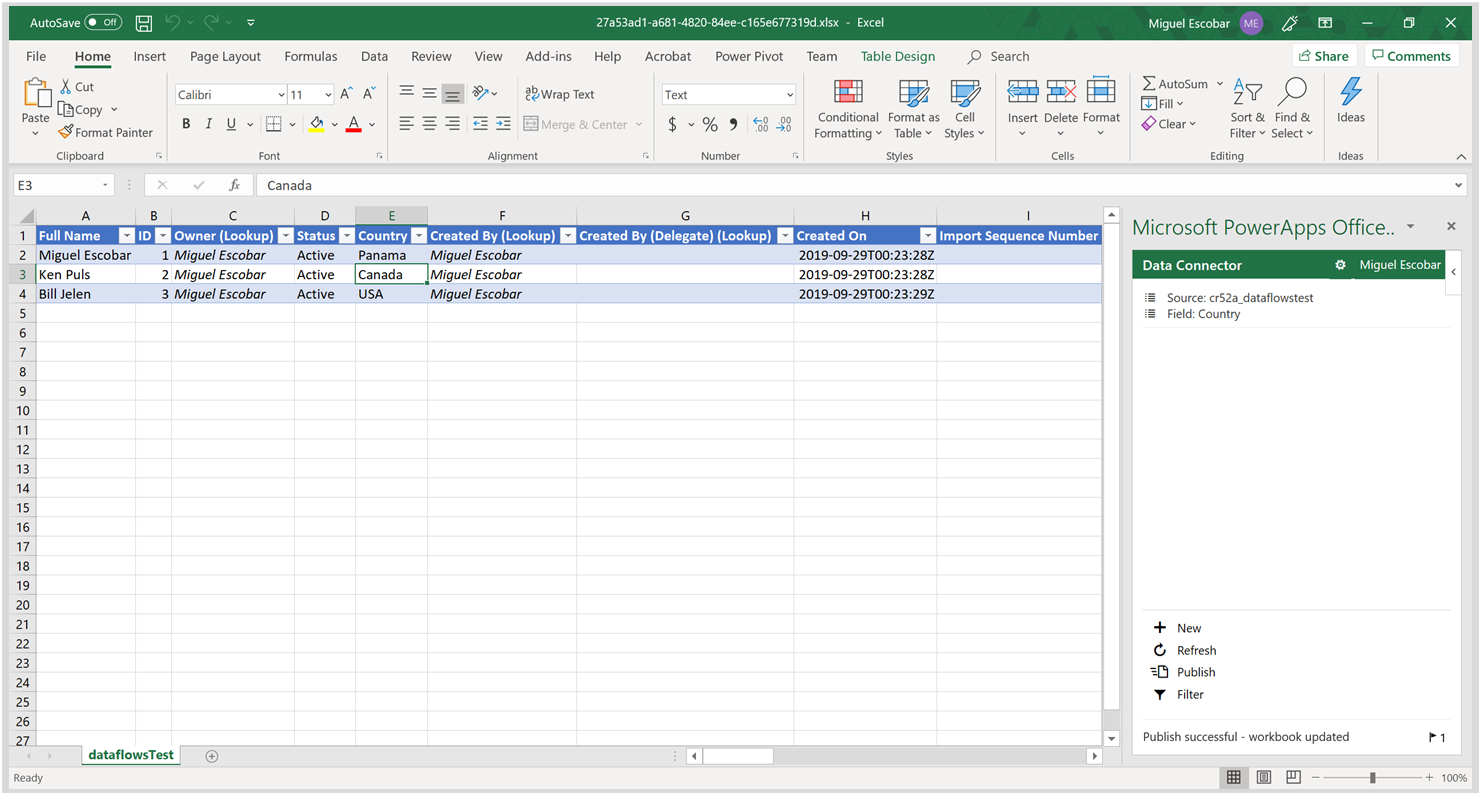
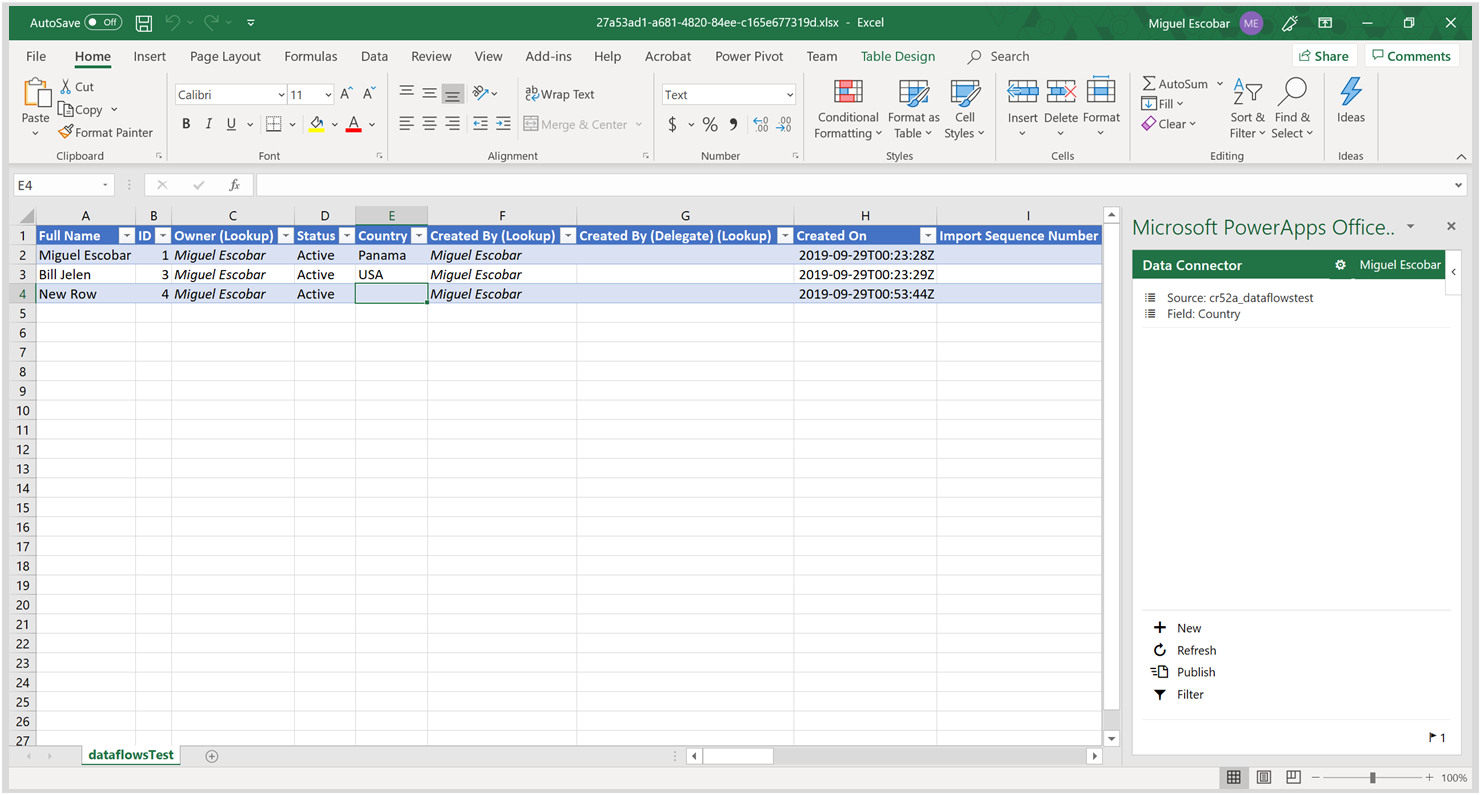
You’ll be able to see the table with your data (1 and 2) and your newly created field (3). You also get the Microsoft PowerApps Office add-in panel on the right to commit changes, refresh or even filter your records.
I entered some values on the Country field and then hit the “Publish” option to commit the changes to the cloud. This is how it looks after you do that:
While doing the publish operation it’ll give you a bunch of statuses of what it’s doing which are helpful.
Step 5: Testing our solution
Now here comes the important part. Testing our solution.
Remember our original source file? It looked like this

And then I changed that to look like this:

Notice that I added the ID 4 before the ID 1 and removed the row where Ken was.
I then went ahead and refreshed my dataflow. After the refresh of the dataflow was done, I went back to the Excel file that was created by Powerapps and hit the refresh from the PowerApps panel and check this out:
Ken is no longer part of the table AND both Bill and Miguel still appear with the correct country in there. The New Row doesn’t have any data for the Country field, but that’s because it’s a new row.
How cool is that? Everything just works!
More ways to make this even better
Since the data is being stored as an entity on the CDM, multiple tools can take advantage of this. Primarily Power BI and Microsoft Flow.
You can connect to your central repository (entity) using Power BI Desktop to make your new analysis.
You could trigger flows based on data that is being entered or modified in those records.
This isn’t even the only way that you can interact with the data. You could even create your app with Powerapps to provide the best UX possible for your end user to enter or modify the data in conjunction with how your dataflow works and how it keeps updating your data.
Conclusion

If you happen to have Powerapps, I highly encourage you to try it out and the Office Store that Powerapps has for Excel.
Dataflows inside of Powerapps is a gamechanger which only makes the CDM even more relevant and important for business users with a low-code interface to come up with robust solutions.
This whole solution could be created in a matter of minutes. No more losing your data because of a refresh operation – the refresh operation should be your friend not your enemy.
If you do not have Powerapps, you can still use Matt’s solution and is completely valid. You may need to circumvent certain inconveniences on the first setup and monitor your data quality manually, but you could handle that. I just wouldn’t recommend it if it’s something super important for your business as I’d recommend going with something like Powerapps which doesn’t have a high cost of implementation or maintenance.


Hi, I like your solution using Powerapp.
But there is only one issue in the solution. The excel file created from “Edit with Excel” contains a lot of unnecessary columns. If I would like to have jus the columns same as the source excel, plus additional commentary column, is it possible?
Hey!
I’m not sure. My guess is that they need to be there, but it would be a good a idea if you post this question on the official PowerApps https://powerusers.microsoft.com/t5/Forums/ct-p/PA_Comm_Forums
Hi, I really enjoy this blog and would like to print them out so I can study them offline. I found the printfriendly app on this site but it’s not including the images among the text. If it is, can you un-check the Remove Image option in that app ? Thanks again for the great articles!
Hey Doug!
I tried looking for that option, but I couldn’t find it.
My apologies, but the articles are not really optimized for printing
Of course, I have an issue right from the start. Your first instruction is, “Before we begin, this setup does require that you have a PowerApps account and an environment with the correct access so you can create your own dataflows and have full control of your entity.” When I navigate to PowerApps and expand Data, I do not have a Dataflows option. I only have:
Entities
Connections
Custom Connectors
Gateways
How do I gain the Dataflow option?
Maybe this might help https://docs.microsoft.com/en-us/powerapps/maker/common-data-service/create-and-use-dataflows